Using Meter and Playing Defense in BlazBlue Central Fiction
Alongside direct comparisons to Guilty Gear tools
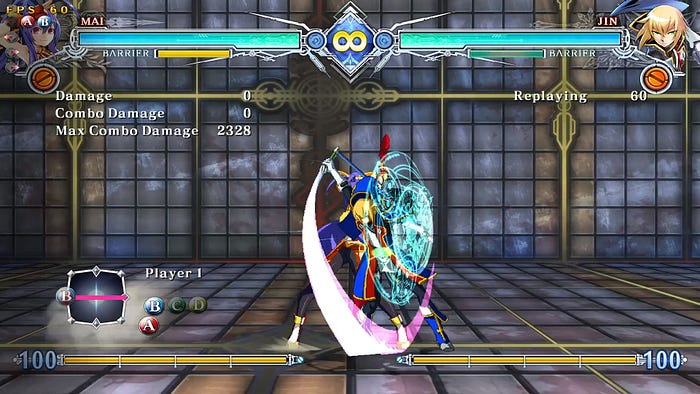
I’ve been learning BlazBlue alongside my stream community and other friends since the rollback beta dropped suddenly in December 2021. A lot of us have been primarily playing Guilty Gear (I’ve been playing Xrd since 2018 or so, and I got most of my stream into +R and Strive subsequently) but a handful of my friends are coming back to BBCF and shaking off the rust now that they can finally play it online. Thus, our frame of reference for what we got ourselves into with Central Fiction was what we were familiar with from Guilty Gear. I’ve already written a guide to defense and meter use in GG games, from XX to GGST, tracking the changes in some tools between iterations. The main difference between my guide and the Dustloop page for defense was mainly just a consolidation of info for every game alongside some context (for instance, I once received a comment telling me that you couldn’t get thrown during a Guard Crush in GGST, or else Potemkin would be incredibly broken… even though Guard Crush’s lack of throw invuln on the recovery animation or on the stagger was a key part of the Garuda Impact into Potemkin Buster setup before patch 1.10, and is still good in the current version.)
In the preamble to my GG defense guide, I explain in detail that the main tug of war between offense and defense is informed largely by two mechanics: the RISC Gauge (the pink guard bar) and Tension Pulse, which determines how much Tension (or meter) you’re building. In GG, blocking (playing defense) makes your RISC go up, and if you want to prevent it from going up, you spend Tension. This means you choose between sacrificing a major offensive resource or having your guard bar cranked dangerously high- even Instant Block, which builds more meter for you, will still cause RISC to increase. Playing too defensively will also incur Negative Penalty, meaning you’ll just straight up lose meter entirely for playing campy or retreating constantly.
BBCF tweaks this in a bunch of different ways. As we’ll see in the rest of the guide, there are a lot of components that are directly analogous to tools seen in GG, either partially or totally 1:1, but offense is still encouraged by BBCF’s systems. Negative Penalty still exists, although this game’s meter, Heat, doesn’t have anything like Tension Pulse tied to it. The equivalent of Tension Pulse in BBCF is something called Active Flow, which is tied to a different meter (and we’ll explain the Burst Gauge properly later, because its use is far more expanded than GG.) I’ll be going through every major gauge and defensive mechanic in BBCF, comparing them to their GG counterparts, and explaining their major differences.
*Also, while a lot of this may restate the Dustloop wiki (since I double-checked all of my info against it,) the various traits of each tool are often spread between multiple pages rather than being consolidated into one page as seen here. You should still refer to the Dustloop if you’re confused or you need specifics about things like frame data.
Meterless defense
Regular-ass blocking
It’s Kind of Like: Come on, man.

I still want to talk about normal blocking because it’s good to remember the basics. BBCF still has air unblockables, for instance, and if you successfully block something in the air you’re still stuck in the remainder of blockstun upon landing. What’s cool about BBCF is that little exclamation marks will appear above your character as indications that you defended ‘wrong’ against something- for instance, blocking high against a sweep will show a little yellow “!”. For stuff that is air unblockable, you will have to use Barrier Block- we’ll get into this later, but for now, think of it as your Faultless Defense. We’ll also get into Guard Crush and Crush Triggers later, but know that you will have to use Barrier Block to avoid those as well.
Backdashing
It’s Kind of Like: Backdashing in GGST is universalized. At most, you only have 6f invuln on a backdash that can be anywhere from 15 to 20 frames. Things like Potemkin’s 22-frame invuln backdash are thankfully gone. BBCF’s backdashes are more like old GG backdashes.
You will have to look up your character’s backdash frame data to figure out how long it is and how long the invuln lasts for. For Hakumen players- you have no invuln on your backdash, so get bent, I guess. A big enough, or active enough, hitbox can usually catch a reckless backdash, and backdashing too much can incur Negative Penalty, so be careful.
Instant Blocking
It’s Kind of Like: Specifically the versions of IB in XX and Xrd.
It’s almost basically the same thing, in fact. IBing within 8 frames of blocking an attack will:
- Reduce your blockstun by 3f
- Directly builds your Heat, and passively cranks your Active Flow rating. (We’ll talk about this later.)
- Reduces pushback taken on block, leaving you closer to your opponent
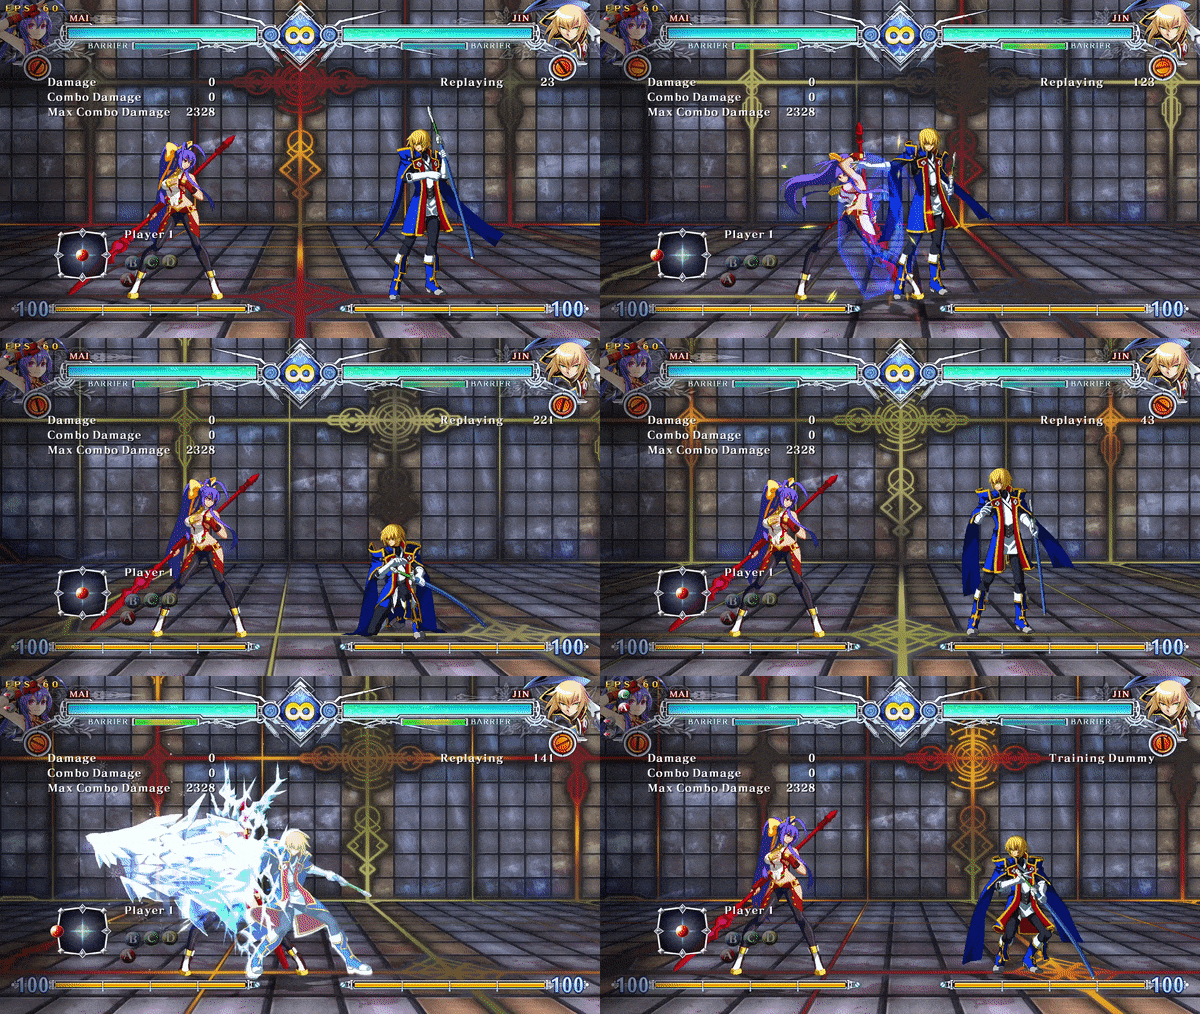
This is the ‘offensive’ block that it is in GG, letting you punish otherwise safe attacks and giving you the correct spacing to do so, and if you end up IBing a multihit you’ll get to cash in on a major metered punish. Remember that you still need to block high/low/air correctly. At a glance, major BBCF resources don’t detail whether IB has a ‘lockout’ window on failed attempts like the one that exists in GG, preventing you from attempting a subsequent IB. I will correct my guide when I find out if such a window exists.
Throw teching
It’s Kind of Like: how throw teching works now in GGST, only with a far more lenient window. A bit of a tangent here, mostly recapping what we’ve discussed in previous guides- In older GG titles, throws are proximity-based one-button commands that have one frame of startup. This means that they can’t whiff, will be faster than anything else (making them great reversals, especially since the throw invuln on wakeup prevents throw teching) and can be option-selected such that if you press, say, 6PH, you will always get 6P if you’re outside of throw range and always get throw if you’re inside it. This also means that throw teching with intent almost never happens- unless a tick throw is becoming easily predictable, it’s more like you and your opponent were just trying to throw each other and then broke. GGST changed this by moving throw to 4/6D, adding a whiff animation, increasing their startup by a frame, and increasing the window for throw teching. This means that you can’t throw OS with Burst, and it’s now easier to escape or punish throws, but they remain strong due to their speed.
In BBCF, universal throws are performed with B+C and have seven frames of startup with 23 frames of recovery. Some characters, depending on the properties of their 5B or 5C, can kara cancel their throws as such. Much like the exclamation marks that show up when you block ‘wrong,’ two types of “!” will appear during the throw tech window. A green “!” will appear during normal throw circumstances and gives you a 15-frame window to break with B+C. A purple “!” will appear if you’re being thrown during hit- or blockstun and gives you a 27-frame window to break. On a successful throw tech, or Throw Break, the attacker is pushed away from the defender, but both players become actionable on the same frame. That’s the short version, but throw teching gets a bit more complex when we consider command throws and other functions such as Throw Counter and Throw Reject Miss.

Traditional command throws cannot be broken raw. However, command throws will trigger the purple “!” throw break opportunity when done while the opponent is in hit- or blockstun, making them harder to combo into. There are still exceptions even to this rule: some command throws, like Atomic Collider, are explicitly designed to be completely untechable even in the previously described situation. There is also a hierarchy of strike/throw RPS:
- Strikes will lose to throws if the hurtbox is successfully thrown.
- Two normal throws at the same time will tech.
- Command throws always beat normal throws. When you tech a command throw you have to do it during the purple “!” throw tech window.
- If two command throws are performed on the same frame, the one with more active frames will win. Individual properties like invincibility will also be a factor.
A Throw Counter occurs when you throw an opponent after they attack you and are stuck in their counter-hit recovery. This state is untechable- Throw Counter makes throws viable as a punish tool. On the other hand, if you mash a throw tech pre-emptively- let’s say you’re trying to beat a tick throw while in blockstun, or you want to avoid a Throw Counter state- you will fail the attempt and be unable to tech until frame 30. (More specifically, if your throw whiff animation plays, you’ll be unable to throw tech from frame 17 to 30; if the animation didn’t appear, you’re still unable to throw tech from frame 4 until 30.) This state is called Throw Reject Miss. The indications that you cannot tech during either Throw Counter or Throw Reject Miss are a big red X over the green “!”. Pressing B+C during other actions that require it, such as Rapid Cancelling, will also put you into a Throw Reject Miss state during that time.
Air and ground tech/recovery
It’s Kind of Like: There isn’t an analogous situation to this in GG. Another tangent, for context- Legacy GG required players to mash an attack button to trigger a tech, which created a variety of situations. If you didn’t tech on time, you could get put into an invalid combo (a ‘black beat’ or ‘blue beat’ or whatever combo.) If you did tech on time but the opponent let their combo reset on purpose, you could get punished on the way down (maybe by being thrown, especially if you’re blocking/FDing, since air tech isn’t throw invuln at all; or by being counter-hit for another combo if you kept mashing improperly.) Also, all characters have individual and automatic wakeup timings, with an extremely brief vulnerability period for OTG setups. In GGST, teching is all automatic and fully invuln, with the wakeup timings being universalized. This makes things easier for both offense and defense: you no longer need to memorize different wakeup timings for okizeme, and the person being hit no longer needs to worry about being looped even when they did the ‘right’ option after escaping a combo. It also means you don’t have to faceroll on your stick or pad, which preserves the health of your hands and input device.
In BBCF, the vulnerability period when a character is lying on the ground is substantial (up to 23 frames on a hard knockdown,) meaning that OTG combo extensions are real and prevalent. Fortunately, there are a variety of tech options at your disposal, and more importantly, you can just hold the attack button instead of mashing to access them. Each of them has different properties and levels of invulnerability.
When knocked down, you have four tech options, easily performed by simply holding the button while being damaged and then taking the tech right away. Three of them have only minor degrees of invulnerability and post-recovery actionability, but remain useful due to being quick and allowing you to maneuver out of the way of okizeme. Those three are:
- Forward roll tech: Hold 6 and any button. Here, you are only fully invuln for 3 frames. From frames 4–17, you are throw invuln, and from frame 18 on, you can begin blocking. You become fully actionable on frame 30. The forward roll lets you pass through your opponent on the first ten frames.
- Back roll tech: Hold 4 and any button. You are fully invuln longer here- from frame 1–10, you can pass through your opponent on the backward roll and are fully invuln. You remain throw invuln until frame 17 and can start blocking from frame 18, and become fully actionable on frame 30.
- Quick tech: Hold 2 and any button. This getup is not strike invuln at all. Instead, you are tech invuln from frames 1 to 13, and can begin guarding on frame 14. The main advantage of Quick Tech is that you are actionable much earlier, as soon as frame 19, and you can cancel this window into a grounded abare attempt. It’s probably worth mentioning that if you hold no tech at all, you will automatically do a Quick Tech, but this is only after 68 frames, during which time you could potentially be OTGed at any point.
- Neutral tech: Just hold a tech button. You are fully invulnerable until frame 32, at which point you become actionable. Neutral tech is also the only one of these that can be performed as an emergency tech within an 8-frame window as soon as you touch the ground after being hit.
The decision making here is not as straightforward as it seems. Sure, neutral tech is the safest option, but if you aren’t blocking right away you may end up holding oki or be put into a combo again after restanding. Quick tech is the riskiest but at least you can start moving again right away. Rolling forward or backward involves a lot of guessing: if you’re against the wall, would it be safer to roll forward and avoid your opponent’s mixup? Or did your opponent call this out by backdashing? Likewise, rolling backward may just keep you stuck in the corner, but if they made that incorrect guess and tried to punish a forward roll, you may be safer.
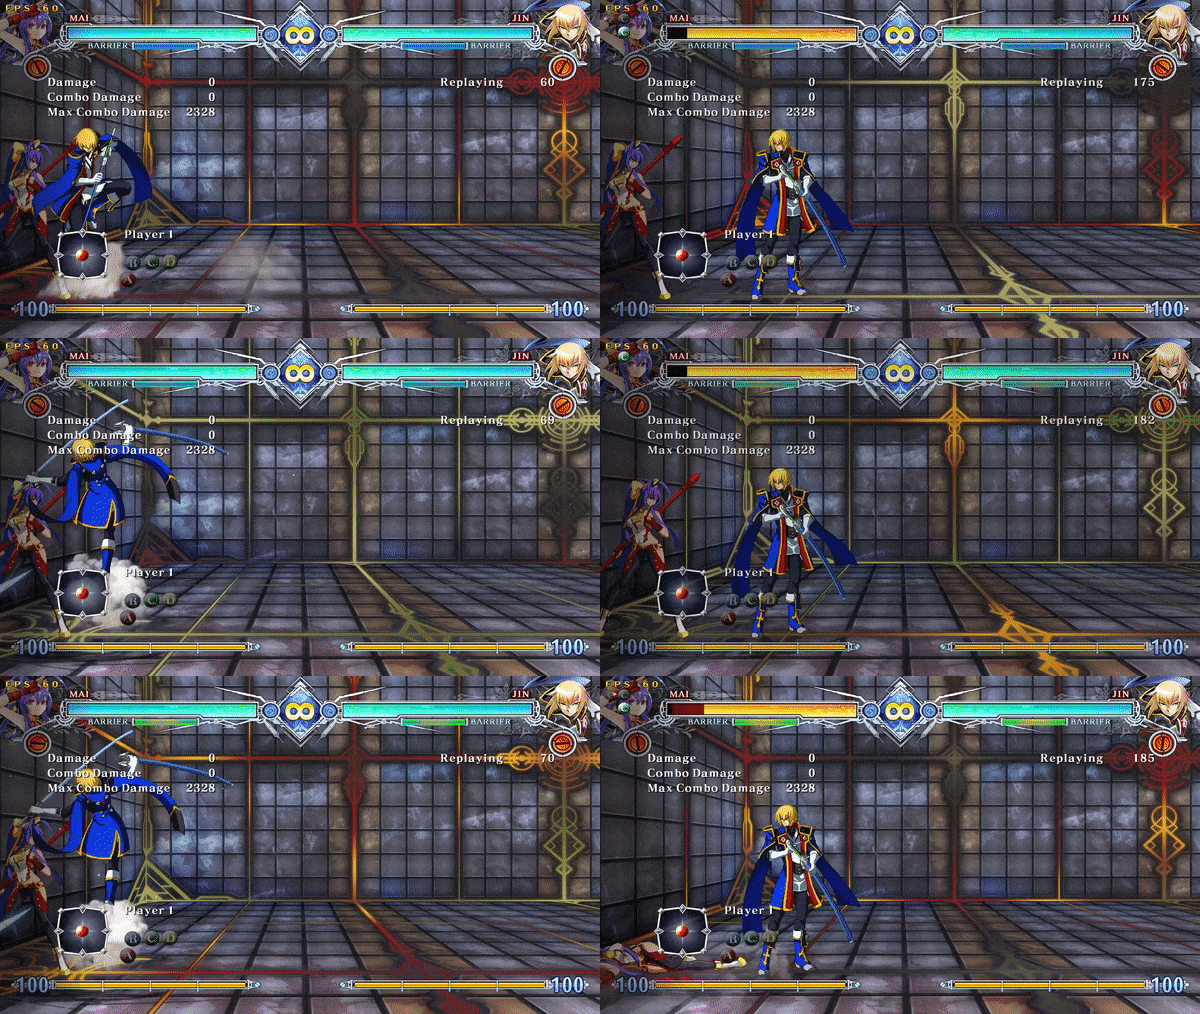
Air tech is done the same way and has the same amount of actionable time no matter which way you tech. You are fully invuln for 15 frames during an air tech. If you forgo an air tech, touching the ground before it’s available, you can perform an emergency tech on landing. As described with the GG mash tech scenarios, you could vary your air tech timing, but this could also be exceptionally risky if it’s called out, so be careful.
Attribute invulnerability vs. hitbox invulnerability
It’s Kind of Like: Hitbox invulnerability will at least be familiar to Guilty Gear players who recognize that some moves, like universal 6P anti-airs, gain partial invuln due to the upper part of the character’s hurtbox disappearing (we call this ‘upper body invuln’ sometimes, and it’s what makes these anti-airs work in the first place.) On the other hand… if you’re familiar with my Trainer’s School series, there’s some applicable information about move heights and attribute invulnerability here.

Hitbox invulnerability is straightforward, but attribute invulnerability is a property distributed to each attack. Whether an attack hits high, low, or mid is usually dependent on whether it has the head, body, or foot attribute. Likewise, some attacks can be head-, body-, or foot-invuln, meaning they will avoid attacks with those attributes. Characters with a 6A command normal can often take advantage of their head-attribute-invuln properties to beat air attacks, which almost always have head-attribute properties. Most attacks have only one attribute, but if you try to trade using a move that is invulnerable to a single attribute while your opponent has a move with multiple attributes, your attack will still lose. Much like hitbox invulnerability, the attribute invulnerability may only last for a certain amount of frames.
Other reversal options and armor
It’s Kind of Like: Things like guard points, super armor, parries, and dragon punches exist in Guilty Gear as well. I’m not looking forward to Baiken coming back to GGST.
Remember that guard points are treated as though you’re blocking while attacking, and are not fully invincible. This means that if you hit an opponent who is guard pointing, and you can cancel your attack ‘on block’ into something else, you are safer than if your opponent had a fully invuln DP and your attack whiffed and got counterhit through it. On the other hand, some parries and guard points may stick you in a ton of hitstop, which lets the defender convert easier.
Metered options
There are three major universal meters that you can see on your screen at a glance: the Burst gauge (the flathead-screw-shaped gauge by the portrait,) the Barrier Gauge, and the Heat Gauge at the bottom of the screen. We’ll go over their uses in brief here, and then break them down into more detail down the page.
The Barrier Gauge is this game’s guard bar. Unlike RISC, which cranks while you block, Barrier is a somewhat more traditional resource that gets used when you block, depleting whenever you spend it on Barrier Block- this game’s equivalent of Faultless Defense. (I’ll be abbreviating Barrier Block as BB.) The Heat Gauge, or just the super meter, is the functional equivalent of the Tension Gauge, and many of the things you spend it on have direct equivalents to GG. While we won’t talk about Rapid Cancelling in this guide, it’s one example of something that is identical to its feature in GG, being BBCF’s name for Roman Cancels. The Burst Gauge is perhaps the most changed between GG and BBCF, being tied to Active Flow and having a totally different set of options to spend the meter on besides just using Burst to escape combos. (Said resource, Overdrive, may be a bit confusing to refer to if you’re used to calling GG supers Overdrives, especially since BBCF has a ton of different supers that are all called different things.)
Barrier Gauge and Barrier Blocking
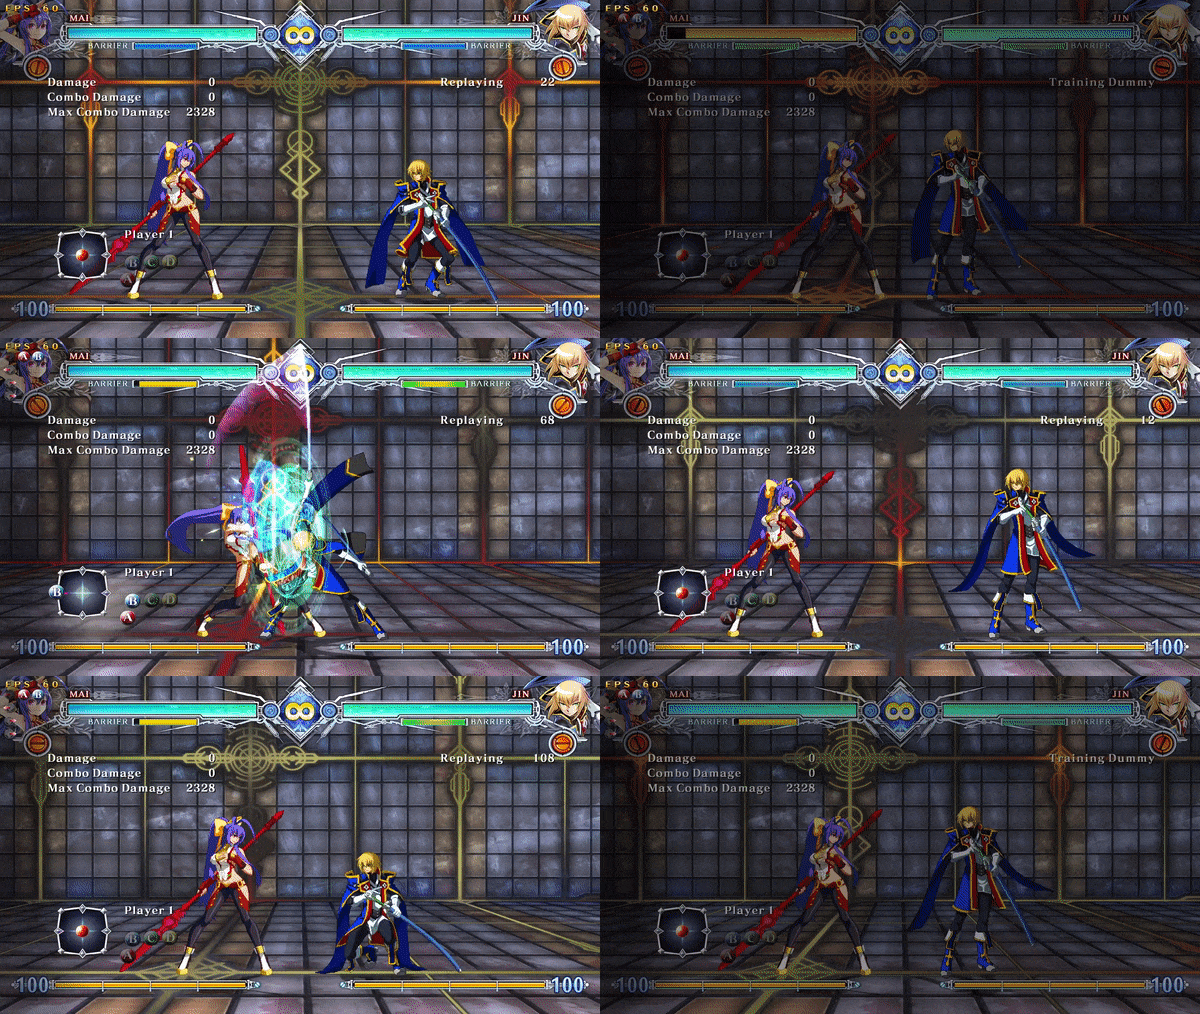
It’s Kind of Like: As described above, BB is basically like FD, except with a dedicated meter. However, depleting the Barrier Gauge is more dangerous than simply spending your Tension on FD during a blockstring…
If you’re familiar with FD, most of the properties of BB remain the same:
- Much like FD, it consumes Barrier even when you’re not actively blocking something.
- You can use BB to brake your dash like FD as well, and it also blocks air unblockables. (The window to BB brake an airdash is really late, so try not to do it too early and get counterhit out of your j.B instead.)
- BB prevents chip damage and increases pushblock. Pushblock is split between both characters unless one of you is in the corner, in which case the character outside of the corner takes the full brunt of it.
- Blockstun is increased by 1 frame.
- A significant addition to BB is that it prevents Guard Crush (we’ll go over this in a bit.)
BB is executed in a similar way as GG’s FD. Just hold block and A+B. Much like with FD, knowing when to use BB, and being more creative with its application (BB braking and taking care to not get hit by anti-airs when IADing in) is crucial to learning defense in BBCF.
Instant Barrier
It’s Kind of Like: Instant Faultless Defense in GGST is directly lifted from this mechanic.
Instant Barrier (I’ll abbreviate here as IBB) provides the combined effects of both IB and BB. IBB is performed by BBing within an 8 frame window of blocking the attack and:
- Prevents chip and blocks air unblockables.
- Decreases blockstun by 2 frames (5 in the air.)
- Like BB, it prevents Guard Crush.
- You gain the Heat bonus from IB.
- Pushblock is slightly higher than if you used regular BB. If you IBBed an attack while in the corner, you would push your opponent nearly fullscreen.
If you’ve practiced IB successfully, you can probably get IBB down as well, so you may as well attempt it in situations where you want to stay safe while generating a lot of space.
Barrier + Throw Option Select
It’s Kind of Like: GGST has a variety of OSes on defense, including an FD/throw OS, that arise as a result of throw being moved to 4/6D. These are kind of difficult in execution since the input may overlap with Burst when you don’t want it to.
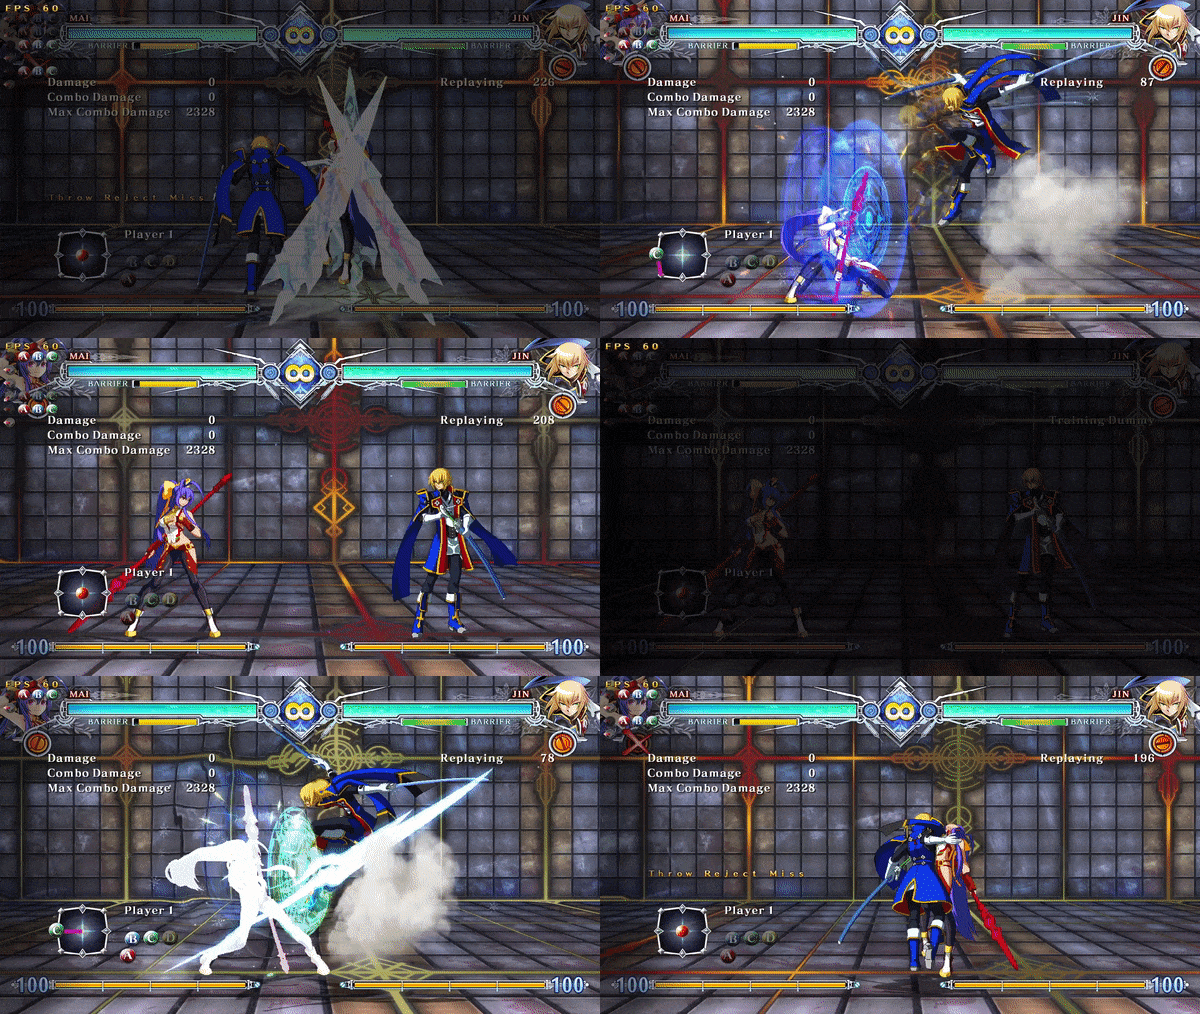
The BB/throw OS is likewise tough since if you get it wrong, you’ll put yourself into the Throw Reject Miss state. While blocking, press A+B+C all at the same time. If performed correctly:
- If your opponent tried a throw within 3 frames of your OS input, you’ll break it. (This is where inputting it ‘wrong’ and getting put into Throw Reject Miss comes into play. Try inputting your OS later rather than early, or you’ll just get thrown out of BB every time.)
- If they didn’t try to throw you, you’ll still get BB and block their offense.
This is great if you’re trying to beat tick throw setups or if you want to cover all your options on wakeup at once.
Guard Crush and Crush Triggers
It’s Kind of Like: Guard Crush is partly the same as GGST’s mechanic of the same name, except you can still block during Strive’s Guard Crush state, and you can be put into it while FDing or IBing. Crush Trigger is similar to Xrd’s Blitz in execution, cost, and combo utility, but does not have a parry/guard point.
Guard Crush is a state caused by certain attacks and all Crush Triggers. If you’re Guard Crushed, you will be in a state where you cannot block the next attack for x amount of frames, which also varies by attack. Throws while Guard Crushed cannot be escaped. The only way to prevent being Guard Crushed is with BB, but spending Barrier on blocking a Guard Crush drains a substantial amount of the gauge, so be careful.

We’re skipping around here, but Crush Trigger is a universal move tied to the Heat Gauge. Crush Triggers cost 25 Heat and are performed with 5A+B. They can be charged to extend the amount of Guard Crush time: an uncharged Crush Trigger lasts 7 frames but a fully charged one lasts for 30. The charge time also affects how much Barrier is drained when they’re successfully blocked- a fully charged Crush Trigger will drain just under half of the gauge! Crush Triggers are universal special attacks, which means you can cancel into them from applicable normals. This amplifies their efficacy in combos and mixups, and a midair Guard Crush will wall-bounce the opponent into a hard knockdown. While we’re here discussing a predominantly offensive mechanic, knowing how it works is key context for how important BB is when blocking.
Danger State
It’s Kind of Like: The closest functional equivalent to Danger State would maybe be when your RISC is cranked all the way up- both states provide the attacker a hefty damage bonus should they get a hit in.
Danger State is why you want to be careful with spending all your Barrier. As we’ve gone over, Barrier is spent while holding BB and depletes with each subsequent hit, dropping significantly when blocking Guard Crushes. Once emptied, your character will enter Danger State, a period where Barrier will be unusable until it’s fully replenished. While in Danger State you will take 20% more damage until your Barrier is replenished. (We’ll discuss some other Danger State triggers as well as how to avoid Danger State when we get to the Burst Gauge.)
You obviously don’t want to be here. The longer you BB, the more in danger you are of eventually getting your guard bar depleted or being Guard Crushed, and either one will lead to huge damage. Mixing up your block types is crucial. Use IB during long block strings to build meter and reduce your blockstun to get a big punish or use IBB to create a ton of space where you can reset the situation. Even simpler stuff like backdashing or jumping away will at least keep you partly invuln while keeping you safe from Guard Crush.
Heat Gauge and Uses
It’s Kind of Like: Tension but without the Tension Pulse part. Heat is mainly spent on the following techniques:
- Distortion Drives (your supers.)
- Rapid Cancels (aka Roman Cancels.)
- Counter Assaults (this game’s Dead Angle.)
- Crush Triggers, which we’ve discussed above.
- Astral Heats (a unique version of Instant Kill.)
Heat is earned primarily by attacking or blocking, with different multipliers for whether an attack hits or is blocked and how it’s blocked. In this guide, since we’re only focusing on spending meter to access defensive tools, we’ll stick to Distortion Drives and Counter Assaults. (Rapid Cancels still have a sort of defensive capability in the sense that you can RC unsafe moves much like you can in GG. Meanwhile, the unique and specific activation requirements for Astral Heat makes them impractical unless you’re flexing.)
Distortion Drives (reversal supers)
Check if your character’s supers have any properties like invuln or guard points. Most supers have a brief startup time before or during the super flash, but that invulnerability alongside the threat of big damage can be huge. Ragna’s Carnage Scissors, for instance, is invuln from frames 1 to 19, while Mai’s Sylvan Hurricane Assault is invuln from frame 4 until she lands. Of course, highly telegraphed or easily punished supers are both risky and costly, so that doesn’t mean they’re automatically good. Toy around with your character’s toolkit to see what other defensive options they have outside of system stuff.
Counter Assaults
Just like Dead Angle Attacks. Counter Assaults are invincible guard cancel attacks that cost 50 meter and are even performed the same way: 6A+B while in blockstun. They won’t KO or do damage, and like other meter expenditures, you will temporarily gain less Heat for roughly three seconds after use.
Automatic Heat Gain
It’s Kind of Like: If you got Positive Bonus for losing.
When you’re at roughly one third (35%) of your health bar, you will slowly gain Heat at 11 units per 10 frames (one unit per frame and then two units on the tenth frame.) This comeback mechanic is disabled during the three seconds (180 frames) after spending Heat. While the meter gain is kind of slow, it starts to add up if you continue playing offensively when you’re at low health, so it could come through in a pinch.
Burst Gauge
Burst Gauge is spent on two resources in this game: Burst, and Overdrive. While Burst is a very straightforward combo breaker mechanic, Overdrive is a totally different system. Both are executed by pressing A+B+C+D.
Burst
It’s Kind of Like: Bursting in BBCF is specifically closest to Blue Burst in GGST, which can no longer be thrown unlike its older counterparts.
Burst can only be performed while in hitstun with a full Burst Gauge. (The gauge is full when it looks like the orange screw.) Burst brings the gauge to 0 out of 10 and is completely invuln for 48 frames (air Bursts are vulnerable after frame 48 until you land.) The only way to defend against a Burst and punish is to already be blocking when the Burst activates. Burst is also the main way you will remove the Danger State debuff, filling your Barrier Gauge back up based on roughly how much time had passed since first entering the status.
Overdrive and Exceed Accel
It’s Kind of Like: There’s no real equivalent to this in GG, since there’s no universal install/comeback mechanic in that series. You can maybe think of it as something like X-Factor, or Sparking, or Heat/Blood Heat, with a bit of Vorpal mixed in. If you’re familiar with Trainer’s School, it’s almost exactly like Synergy Burst, with Exceed Accel being like Burst Attack.
Overdrive costs 70% of the Burst Gauge, but still requires a full Gauge to activate. Overdrive can be performed while in neutral, as a cancel during a combo, or as a guard cancel. Each version is fully invincible but have different recovery times: the normal version lasts for 16 frames, the Overdrive cancel (referred to in-game awkwardly as Cancel Over Drive) lasts for 6 frames, and the Overdrive guard cancel (or Over Drive Raid) lasts for 26 frames. Overdrive grants a ton of different properties:
- The round timer is paused while Overdrive is active.
- Your character may get some unique properties during Overdrive- typically your specials, Drives, and Distortion Drives are all powered up, but there may be some additional properties.
- Most importantly, any combos you land while in Overdrive cannot be broken with Burst.
- Much like Burst, Overdrive is the other main way to remove Danger State as described above, and will fill your Barrier Gauge equivalent to roughly however long you spent in Danger State.
The duration of your Overdrive is directly proportional to how low your HP is. At full health, the timer will only be 4 seconds (240 frames,) but when you’re below a third of your health it’ll last for 8 seconds (480 frames.) Duration is halved when you’re using Overdrive as a cancel or guard cancel.

Overdrive has some obviously strong properties! You can use it offensively to extend combos and squeeze out more damage; you can use it defensively to escape some dicey situations and immediately turn it around; you can even lock out your opponent’s defensive options in a high-pressure situation. It may be crucial later in your practice and labbing to get familiar with combo routes that may only work with an Overdrive cancel or with the bonus properties you gain while activated.
If you press A+B+C+D again while in Overdrive, you can perform an Exceed Accel. This is a universal super with invulnerable startup that costs the remainder of your Overdrive duration. All Exceed Accels share the same properties besides those already listed:
- You can immediately perform an EA after activating OD by continuing to hold the buttons down. Startup of EA is always 20 frames when done in neutral, but halved to 10 when cancelled into as a special cancel or when performed by continuing to hold A+B+C+D after OD activation.
- A successful EA triggers Active Flow, which we’re about to go into detail on (unless you had already been in Active Flow once during the round.)
- Base damage is around 2k, with a bare minimum of 300 if cancelled into at the end of a combo, but these numbers are doubled during Active Flow.
- All EAs except for Nu-13’s are -10 on block, but that doesn’t necessarily mean they’re all punishable due to things like pushblock and such.

Exceed Accels are usually how you want to cash out of Overdrive, but if you’re performing Overdrive as a reversal you can go straight into an EA to get some early damage right away and go directly into Active Flow. All their attributes are universalized, and they effectively provide everyone with a reversal super that you can use in a pinch. However, choosing between OD/EA and Burst will be a very difficult decision to weigh during a round. What if you pop OD and then waste it, and then get put into your opponent’s blender? Or maybe you should save Burst to escape a long combo, sacrificing your opportunity to do more damage later? Some tips about proper activation and use:
- OD will always last longer when activated in neutral, but that also increases the risk of you not being able to cash in on it. Using it as a guard cancel or to extend your offense may not last a long time, but at least you can guarantee the bonus damage and maybe even end with an EA.
- If you have it and you need to save yourself, you should just spend the Burst. Even if the cooldown on the gauge is longer, creating space in a pinch and stopping your opponent from continuing their combo (and maybe even preventing their chance to enter OD themselves!) is still extremely useful.
The utility of both Burst and OD are, fortunately, heavily improved by Active Flow.
Active Flow and Negative Penalty
It’s Kind of Like: This is the closest thing we get to Tension Pulse in this game. Negative Penalty is mostly the same as it was in GG, but the meter depletion is different. Incidentally, did you know you can earn Positive Bonus in GGST without a wallbreak as long as your Tension Pulse is sufficiently high? It seems like Team Red took a lot of queues from Team Blue during development.
Active Flow is your reward for going all in, all the time. If you’re playing offense very well (or successfully performing other options that are ‘aggressive’ such as IB) then eventually you will activate Active Flow. You will see when you (or your opponent) are closer to activating Active Flow if you see “Attention!” pop up under their character portrait. Once you’ve successfully triggered AF, it will last for 14 seconds. Popping OD also extends the duration of Active Flow until OD is over. While in Active Flow, you receive a 10% damage buff and your Burst Gauge refills four times faster, meaning any early expenditure of the gauge can be justified if you manage to make a comeback effectively. Remember also that successful Exceed Accels immediately put you into Active Flow, meaning that you can redeem an OD activation into more damage once you exit the mode. It’s also important to know that you can only earn Active Flow once per round, so you can’t loop an Active Flow activation into OD into EA into an extended Active Flow. Also, using a Burst will immediately end Active Flow regardless of how much remaining time you have.
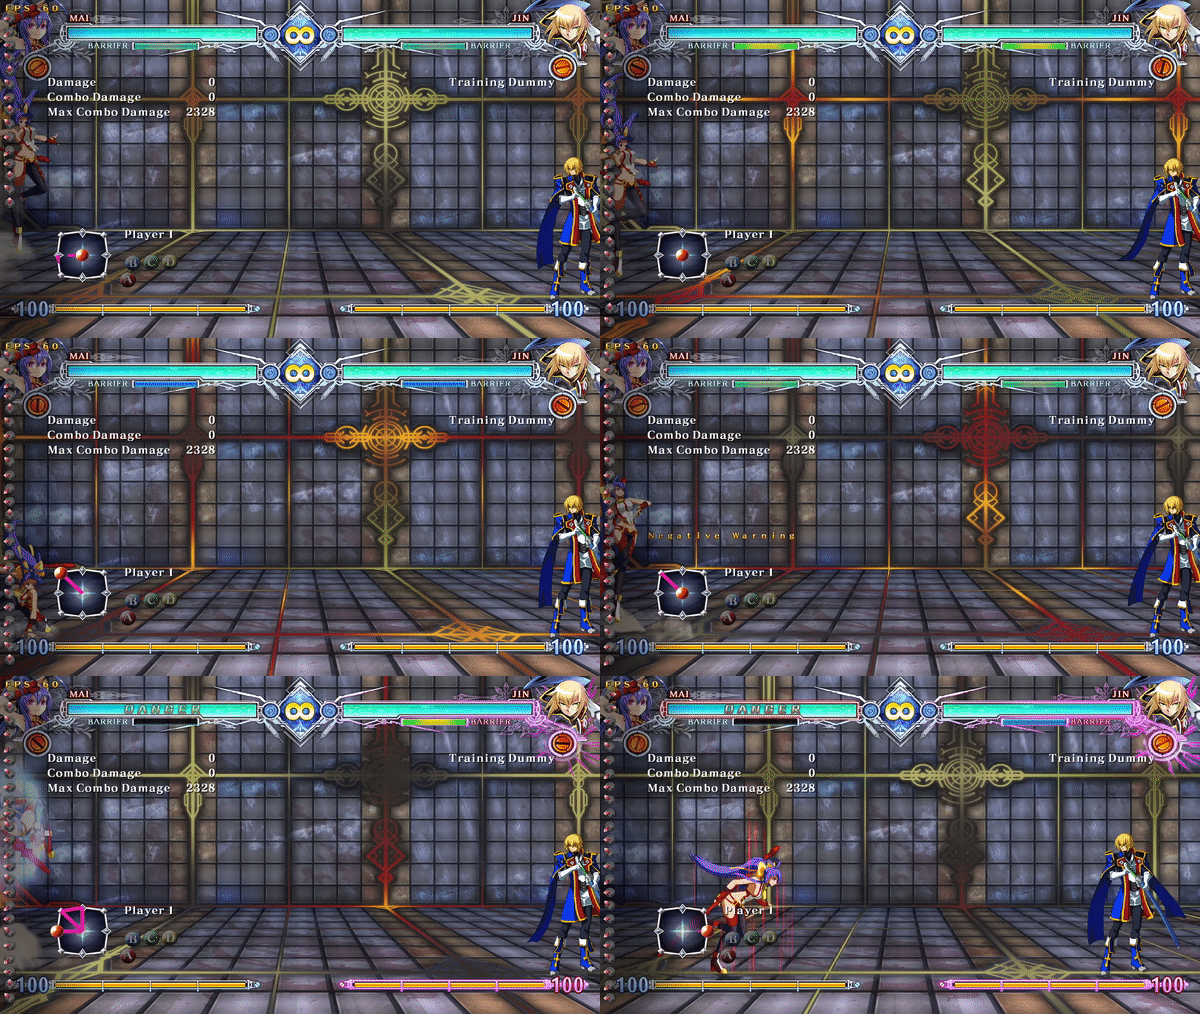
Negative Penalty is the tail side of Active Flow’s coin. If you perform too many lame or passive options in a row (a bunch of backdashes, air backdashes, etc.) your character will flash red and you’ll receive a Negative Warning. Keep going with your turtling, and Negative Penalty will empty your Barrier Gauge and put you in Danger State automatically. Not only that, but Negative Penalty will give your opponent Active Flow, ends yours if you have it, and prevents Overdrive from negating Danger State! This shit sucks, and it’s not a situation you ever want to be in, so don’t be in it. Even if you’re playing a zoner or some other archetype that encourages keepaway or is hard to get in with, if you’re going in on occasion or throwing out attacks you can usually keep the Negative Warning away.
Overdrive Option Select
Much like the BB/throw OS described above, you can perform an OS while blocking where you will either block, neutral Overdrive (rather than Over Drive Raid,) or throw tech. While blocking, hold the D button, then return to neutral positon (stop holding 4, 1, or 7) and press A+B+C. (Your character will remain in blockstun and the blocking animation during gapless mixups if you’ve been blocking correctly, making the return to neutral slightly less risky.) If you’ve executed the Overdrive OS correctly:
- you will tech the tick throw,
- you will activate a neutral Overdrive instead of guard cancelling into it, giving you a longer timer,
- or you will continue to block.
Obviously, the main risk here is that if you try to perform this during an exceptionally tight blockstring (we’re talking like a 1-frame gap,) you may get counterhit when you return the stick to neutral and press A+B+C. It may be simpler to go for the regular BB/throw OS or just guard cancel Overdrive if you don’t have a lot of confidence in the attempt.
Conclusion
I think this document ended up being significantly longer than either of the guides on GG or Melty Blood defense. You have lots of different options in basically every situation when responding to offensive pressure! Here are a few takeaways:
- Remember to always mix up your defensive options. Overly relying on only one type will leave you vulnerable in different ways. Solely relying on normal block will leave you chipped or Guard Crushed; spending all of your Barrier will leave you defenseless in other situations; using only a single tech direction every time on wakeup can be predictable. Learning how to mix things up and adding IB to your repertoire will help a ton.
- Research your character’s defensive options. We can’t all have Naoto’s EX 623D, but you may still have some other type of tool you can rely on in addition to system options.
- Burning Heat to open up your opponent or stay safe is important. Remember, you don’t retain Heat between rounds, and you carry your Burst Gauge process through as well. You’ll feel dumb for dying with 100 Heat instead of spending it on offense or even a reversal super.
- There’s a billion different ways to get creative with Overdrive in this game, and the creative layers will expand as you continue playing and experimenting. Just remember that Bursting is almost always a safe choice unless you know your opponent has a setup that can bait it.
- Once again, don’t forget about even the most basic stuff like just backdashing or jumping out of the way. As long as you remember to play offensively to avoid Negative Penalty, you may find that the easiest defensive option was the best one in a given scenario.
Like its heavy metal counterpart, BBCF is a game with big damage and big oki. Learning when you get to take your turn and play is half of the battle. Figuring out all of your options when defending in certain situations can often be the key to finally accessing your own offense.
